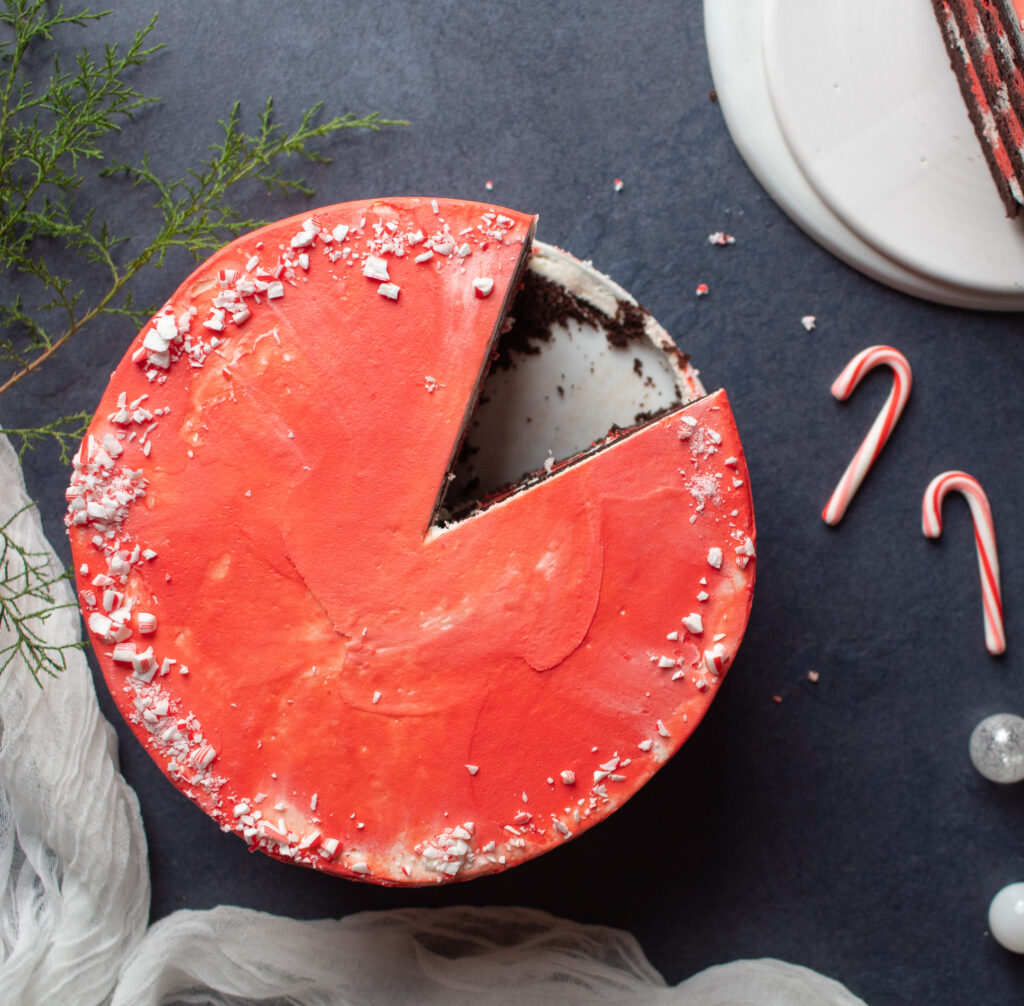
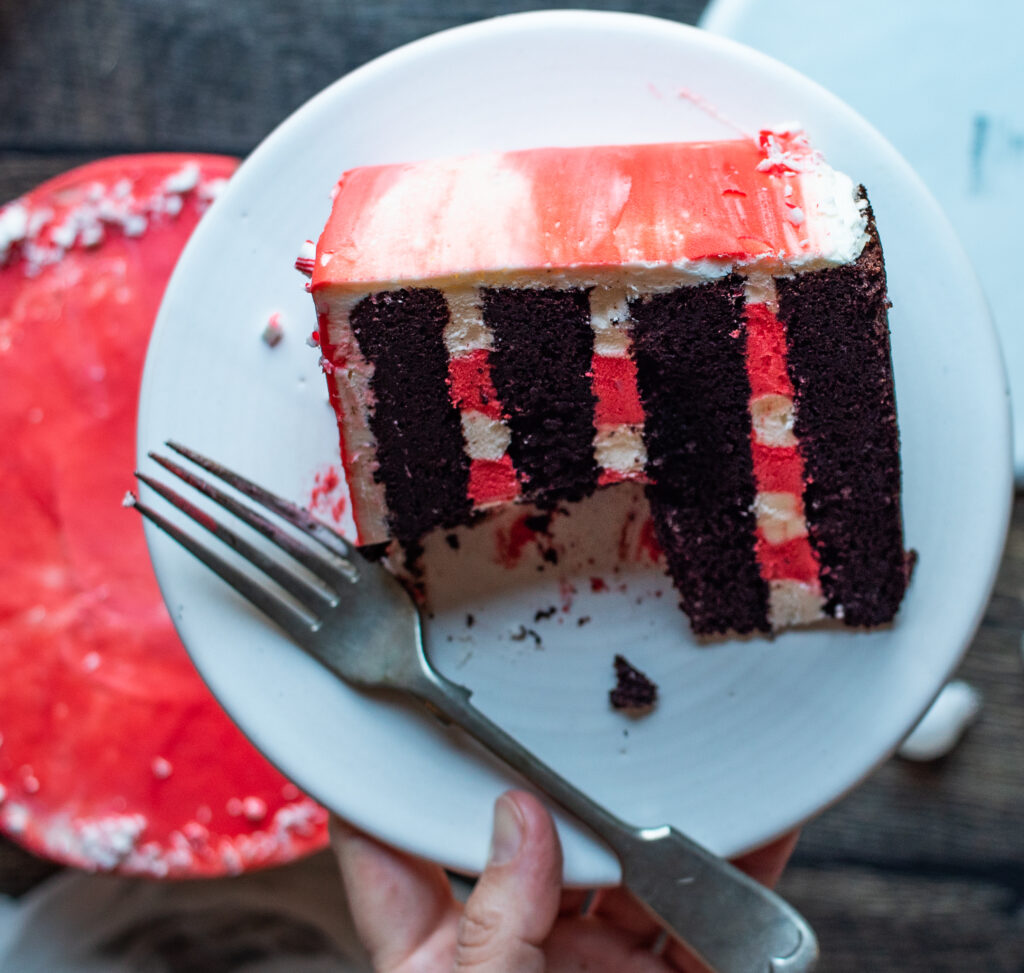
Fudgy, creamy, minty! This chocolate peppermint cake is moist, decadent, and rich with just a hint of peppermint and a super fun surprise in the center. It is a fun, festive, and gluten free cake the entire family will love this holiday season!
Do you love layered cakes, but find them intimidating to make? Fear not, this cake is actually fairly simple and a complete show stopper with the fun "striped" icing inside.
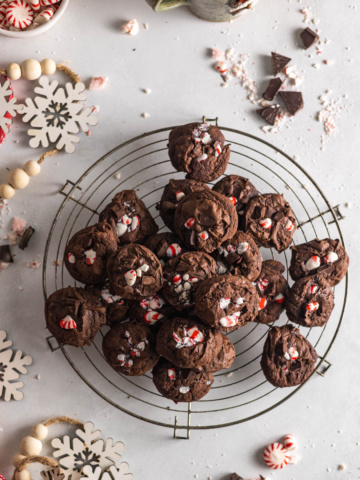
If you love chocolate and peppermint together, you might enjoy my recipe for Gluten Free Peppermint Brownie Cookies!
Jump to:
- Why You'll Love This Recipe
- Tools You'll Need
- Ingredients
- Substitutions
- How to Make Chocolate Peppermint Cake (Gluten Free)
- How to Frost the Chocolate Peppermint Cake
- Prep Ahead Options
- Serving Suggestions for Chocolate Peppermint Cake
- Recipe FAQs
- Tips and Tricks for Success
- More Holiday Recipes You'll Enjoy
- Chocolate Peppermint Cake (Gluten Free)
Why You'll Love This Recipe
- Gluten friendly! This cake is the most decadent gluten free chocolate cake I've ever had! I use a bit of melted dark chocolate in the batter, making it slightly more dense and moist.
- The peppermint is so refreshing! I love using peppermint extract in desserts. The mint in this chocolate layer cake lightens it up just a bit.
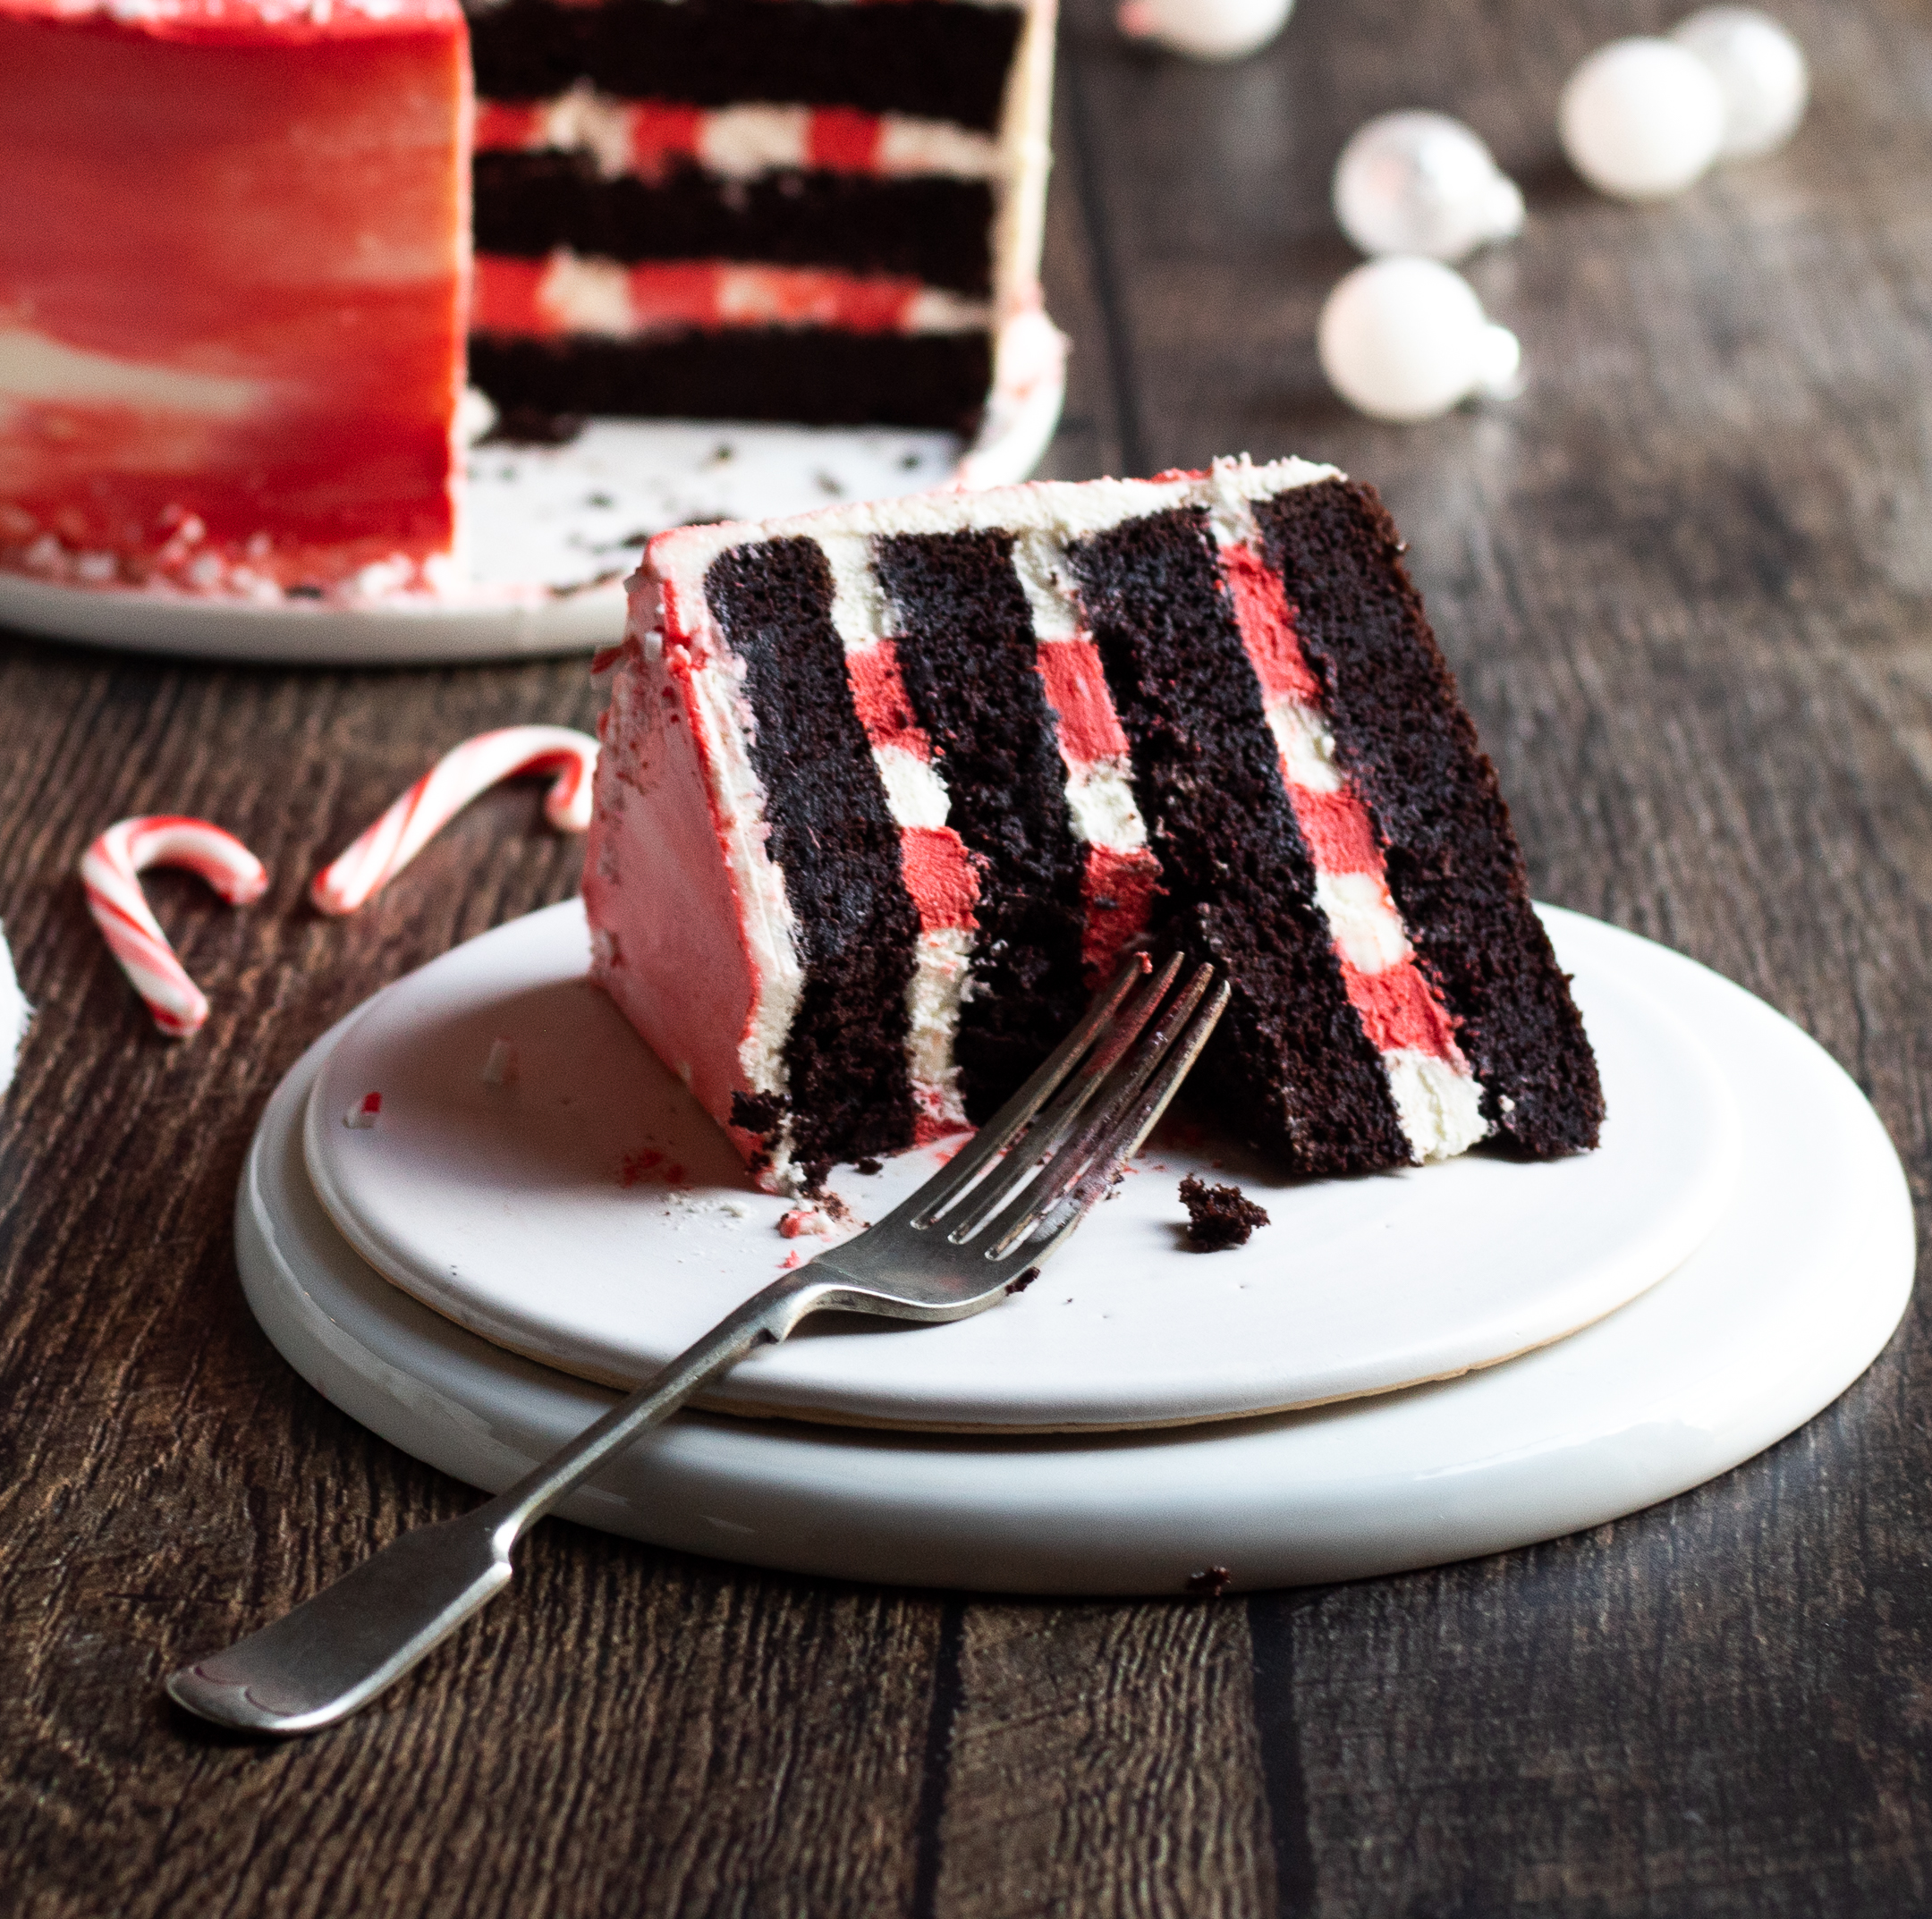
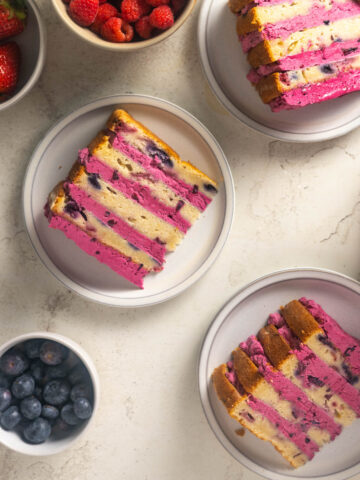
- A fun surprise inside! Using a simple frosting technique, I pipe alternating rings of red and white frosting in the layers of this cake, which creates a really fun effect. It is sure to surprise your guests this holiday!
Tools You'll Need
- 2 8-inch cake pans
- 1 stand mixer or hand mixer fitted with paddle attachment
- 2 mixing bowls
- 1 set of dry measuring spoons
- 1 set of liquid measuring cups
- 1 set of dry measuring cups
- 1 rubber spatula
- 2 cooling racks
- 1 serrated knife
- 1 offset spatula
- 1 bench scraper/cake scraper (optional)
- 2 plastic piping bags
Ingredients

This recipe begins with granulated sugar and unsalted butter. Once those are creamed together, add the eggs.
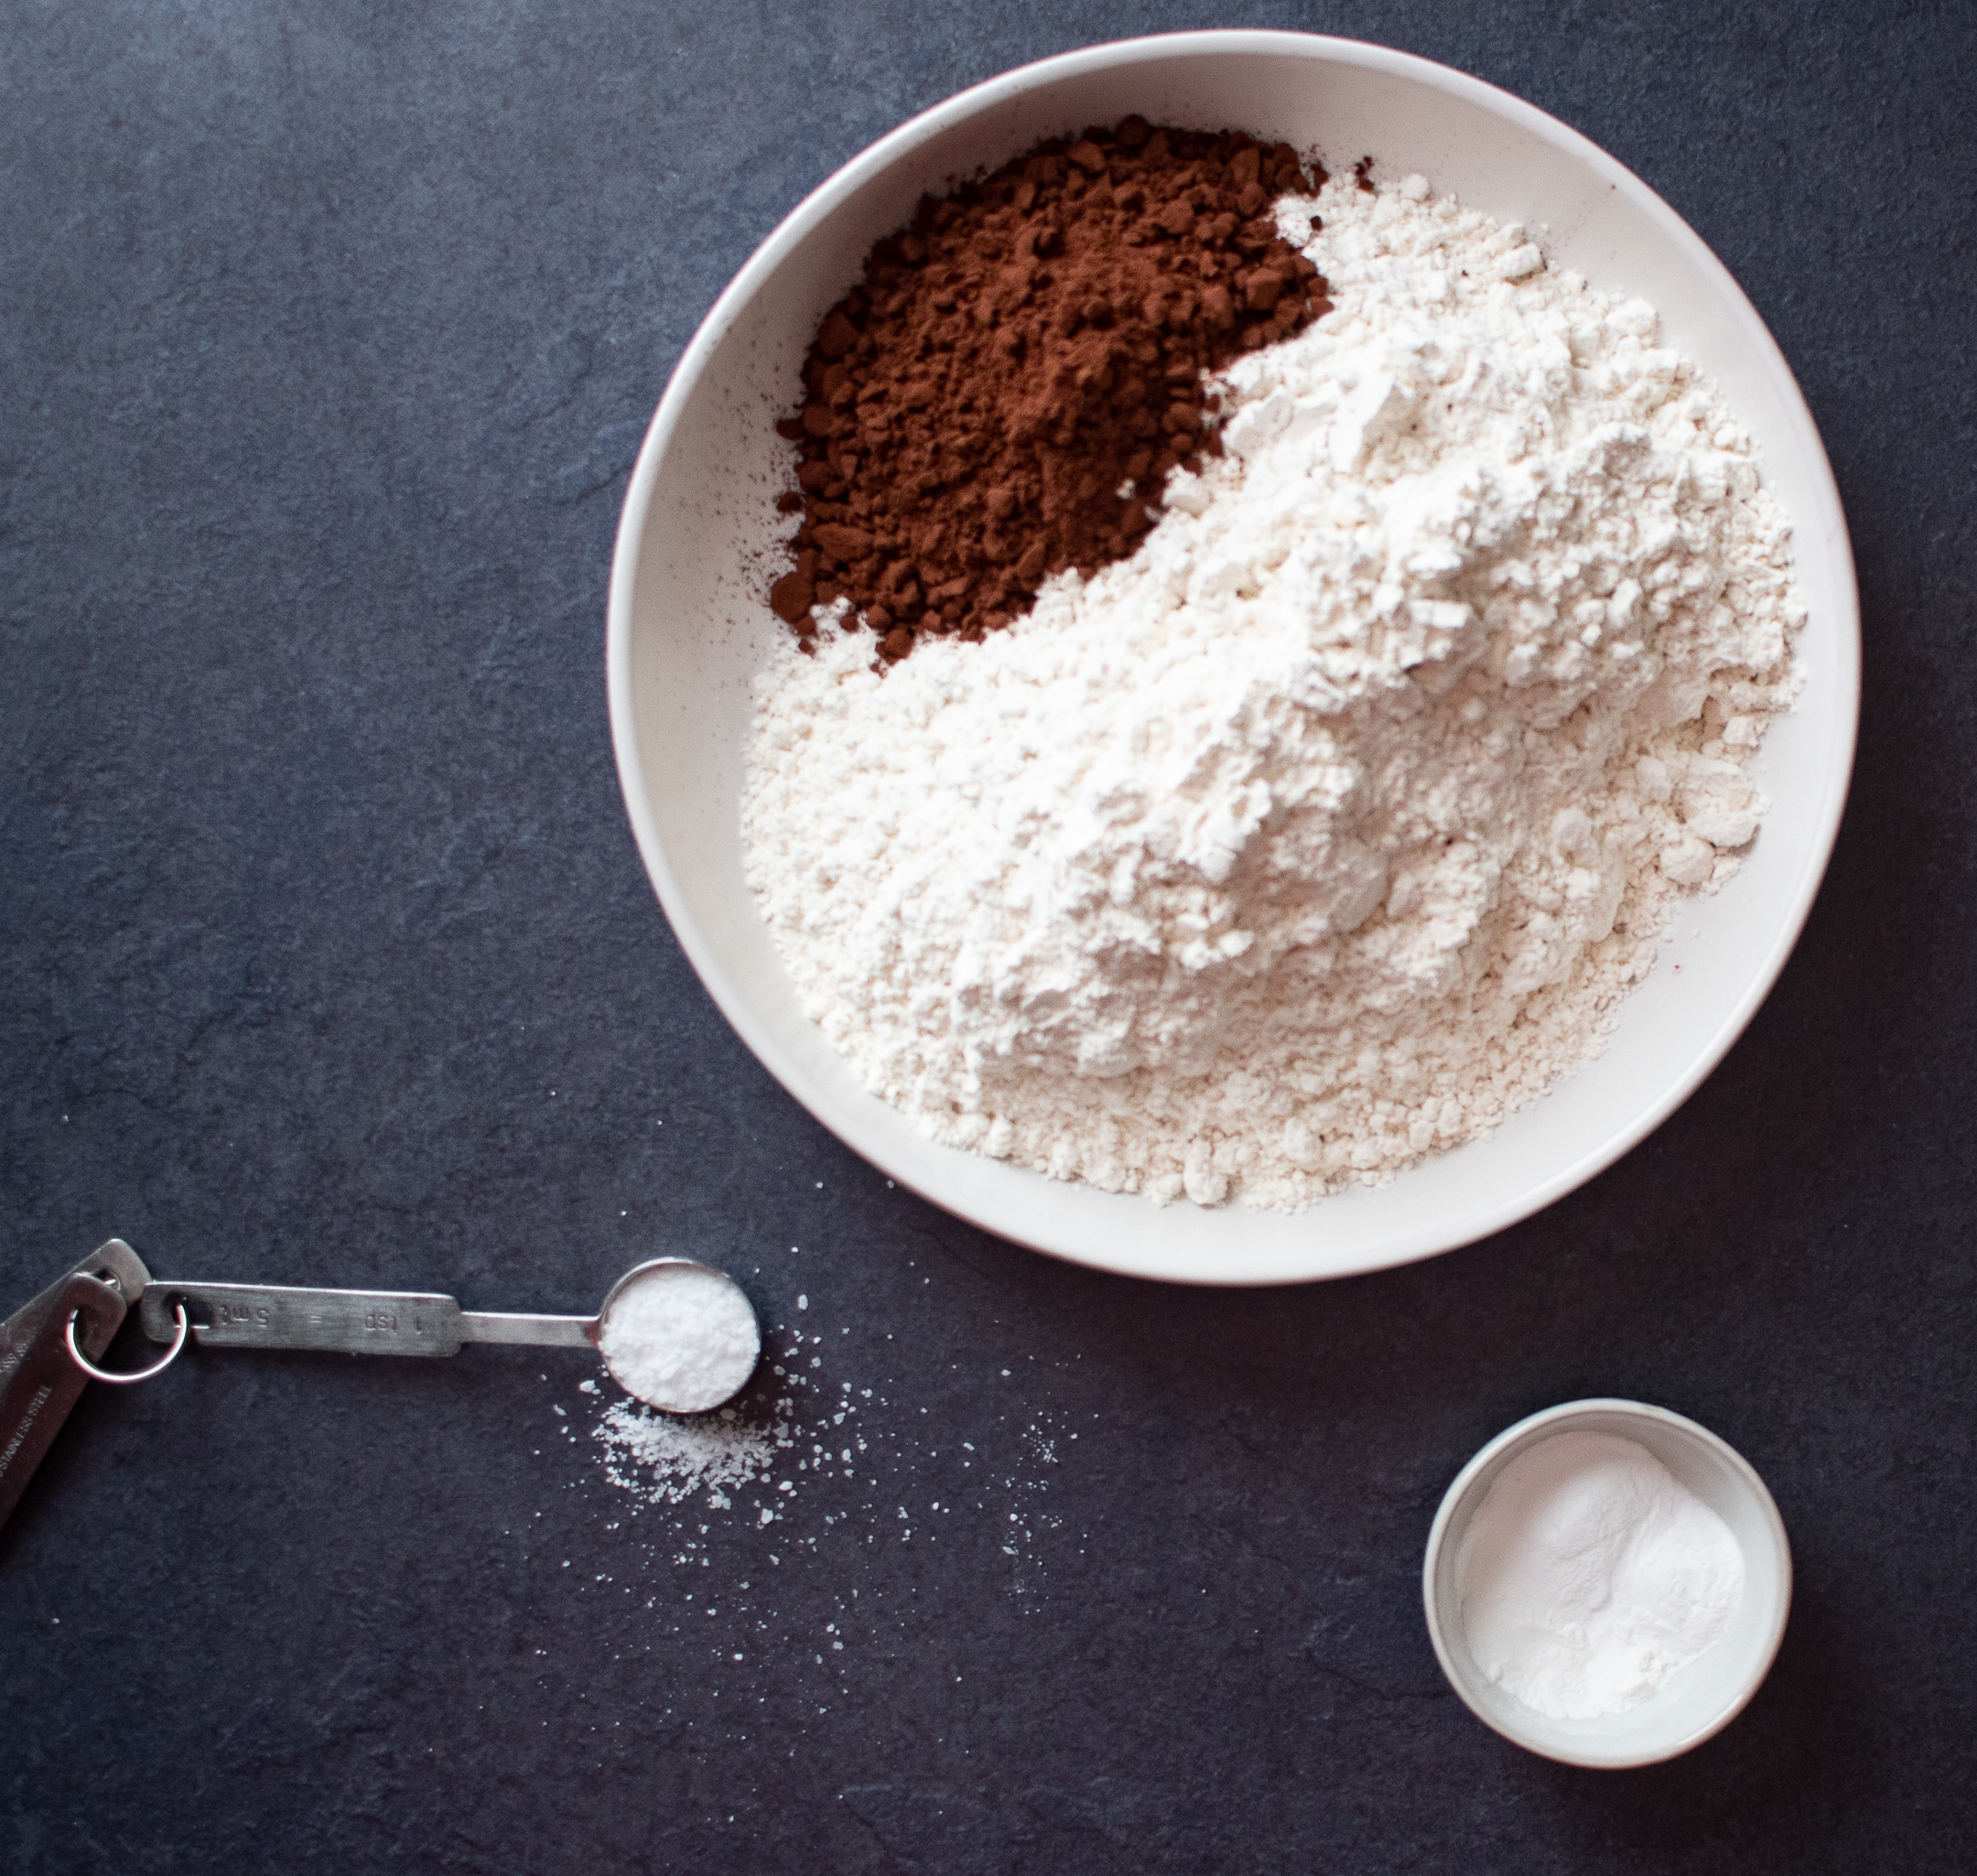
Next, mix together gluten free all-purpose flour, cocoa powder, baking soda, and coarse kosher salt.
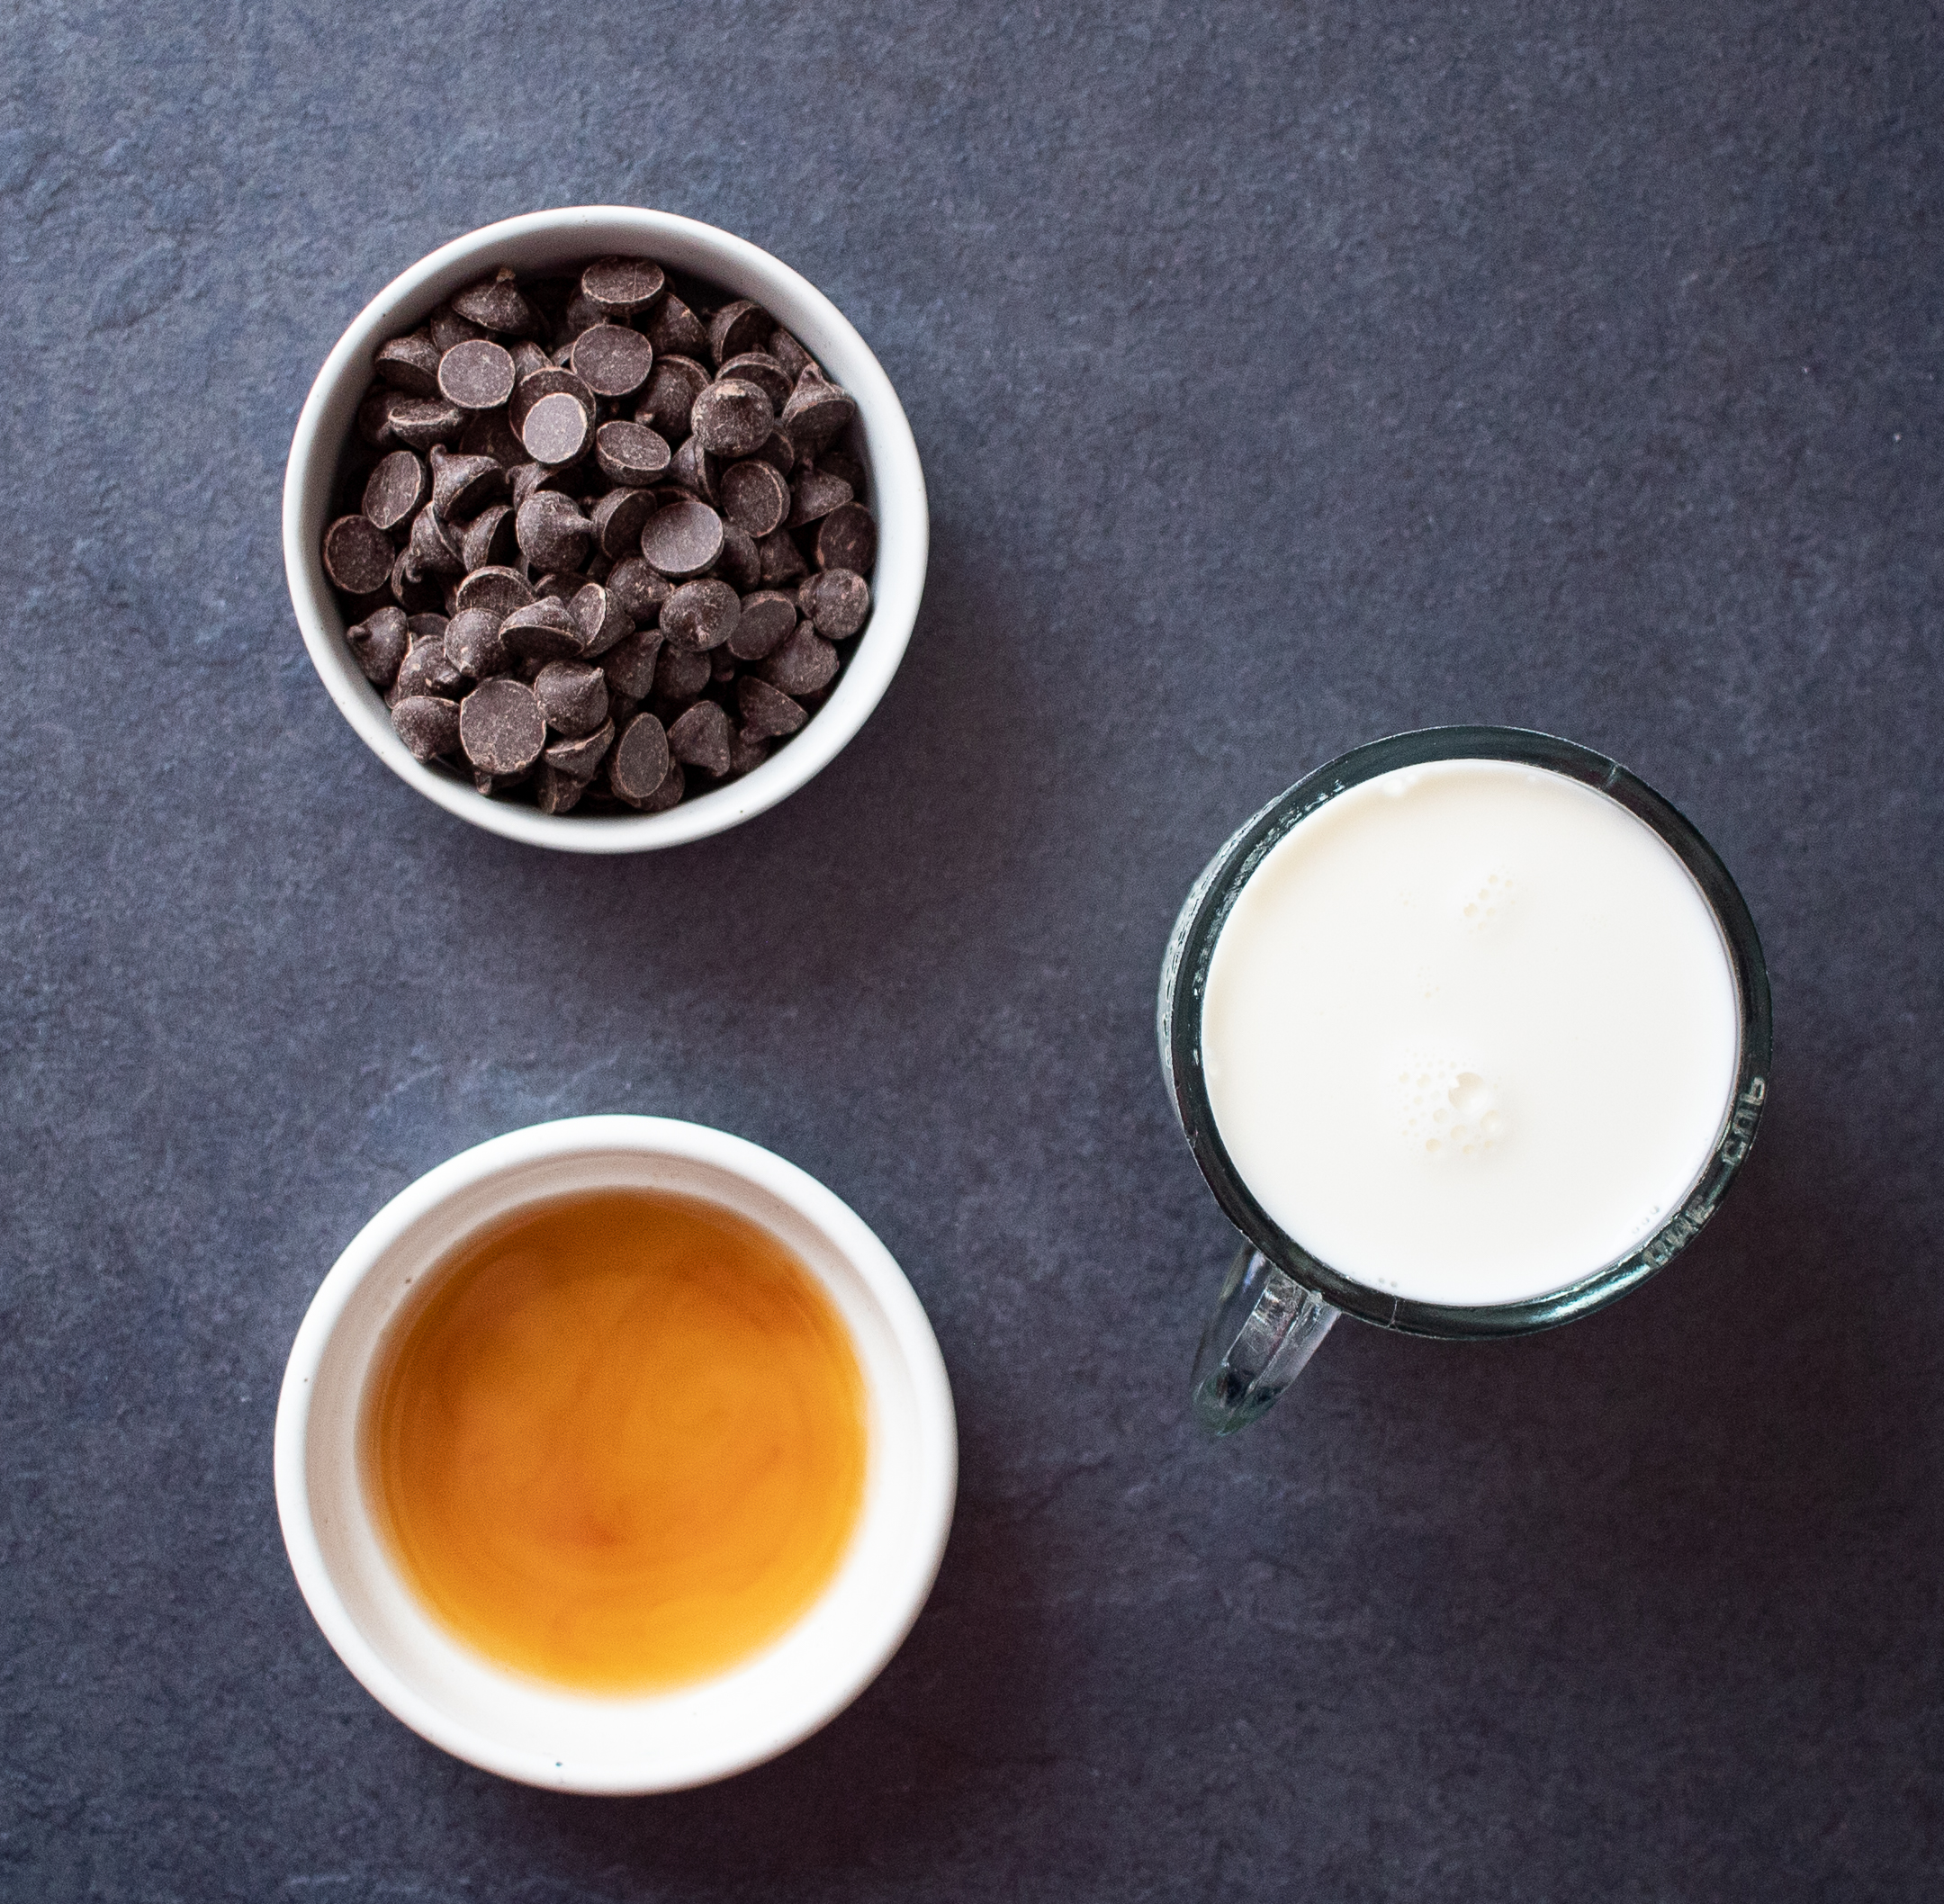
You will alternate the dry ingredients with milk, peppermint extract, and vanilla extract. Once these are mixed in, you'll add melted dark chocolate.
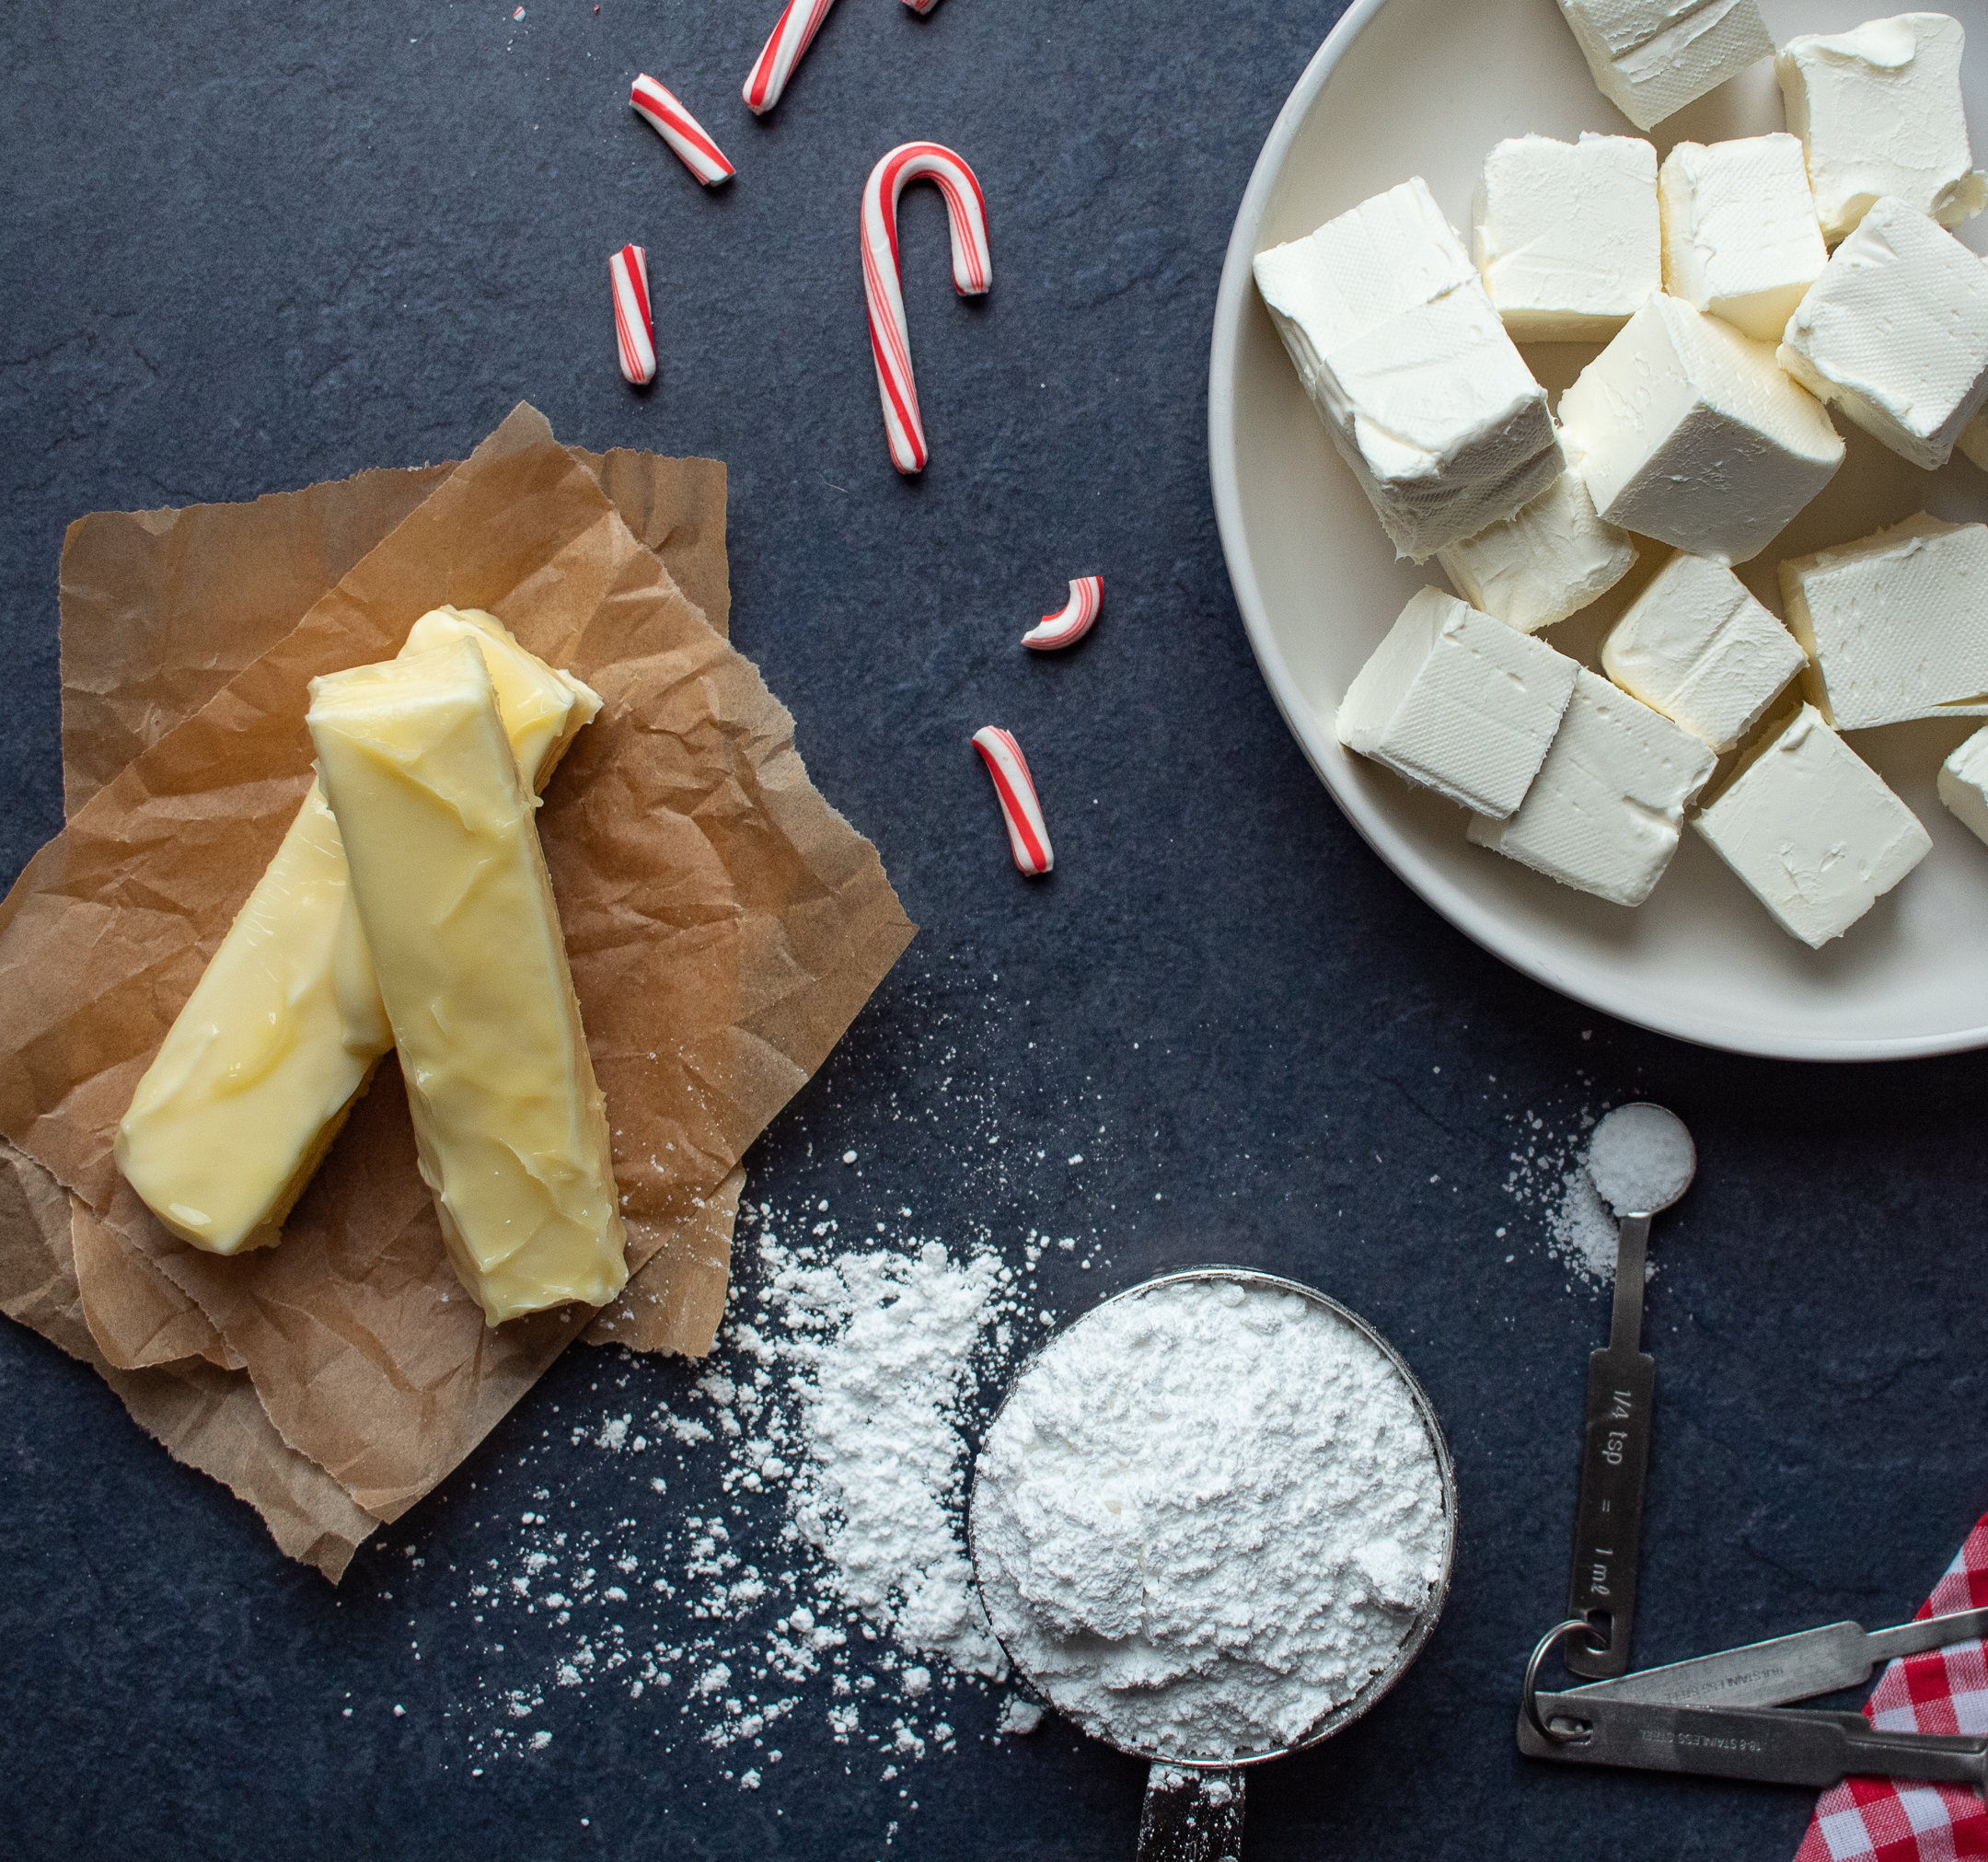
For the peppermint cream cheese frosting, you will cream together cream cheese, butter, powdered sugar, salt, and a bit of peppermint extract.
Substitutions
- Regular all-purpose flour. If you are not eating gluten free, you can certainly substitute regular all-purpose flour in this recipe.
- Leave out the peppermint extract. This cake is equally delicious without the peppermint. If peppermint is not your favorite, you can simply omit.
How to Make Chocolate Peppermint Cake (Gluten Free)
Preheat the oven and prepare your cake pans.
Cream the granulated sugar and butter until light and fluffy. Add eggs, one at a time, scraping down the bowl after each addition.
Whisk together the dry ingredients. Mix together the wet ingredients, leaving out the melted chocolate.
Add ⅓ of the dry ingredients to the mixing bowl, and mix on low speed just until combined. Turn the mixer off, and scrape down the sides of the bowl. Add ½ of the milk mixture, and mix on low speed just until combined. Turn the mixer off, and scrape down the sides of the bowl. Add another ⅓ of the dry ingredients to the mixing bowl, and mix on low speed until combined. Turn off the mixer, and scrape down the sides of the bowl. Add remaining milk mixture, and mix on low speed just until combined. Turn the mixer off, and scrape down the sides of the bowl. Repeat with the remaining dry ingredients.
Finally, fold in melted chocolate. Divide evenly among cake pans, and bake for 35-40 minutes, or until the cake bounces back when gently pressed in the center or a toothpick inserted in the center comes out clean. Remove from the oven, and place on a cooling rack for 10-15 minutes. Turn the cakes out onto the cooling rack and let cool completely.
While the cakes cool, make the Peppermint Cream Cheese Frosting. To make the frosting, place cream cheese in the bowl of the stand mixer, fitted with a whisk attachment. Whisk on medium speed until the cream cheese is blended and beginning to become fluffy. Add the butter, and mix until well combined.
Add the powdered sugar, peppermint extract, and salt to the bowl, mix on low speed until the sugar is incorporated. Turn the mixer off and scrape down the sides of the bowl. Turn the mixer on high speed, and whip until light and fluffy. Turn the mixer off, and scrape down the bowl again. Turn the mixer on high, and whisk 1-2 minutes until the mixture is smooth and well incorporated.
Remove the bowl from the stand mixer, and place about ⅓ of the frosting in a medium bowl. Whisk 1 tsp red food coloring or 15-20 drops of red gel food coloring into the medium bowl of frosting until you have reached the desired degree of red.
How to Frost the Chocolate Peppermint Cake
Before icing the cake, place red frosting into a piping bag or large zip top bag. Place a bit of white frosting into another piping bag or large zip top bag. Cut the end of the piping bag or corner of a zip top bag to create a ½ inch opening.
To frost the cake, first cut each cake in half crosswise, creating four layers of cake. Place the bottom layer of cake onto a cake stand or plate and place on a turntable (if you have one!). Beginning with the white frosting, pipe a circle around the outside edge of the bottom layer of cake. Next to the white frosting circle, place a circle of red frosting. Repeat the process with the white frosting and red frosting until you have covered the entire layer of cake. Repeat the process with the next 3 layers of cake, and finally place the top layer on top of the cake.
Chill the cake, until the center layers of frosting are firm, about 15 minutes. Frost the outside of the cake with white frosting, creating a “crumb coat”, and then repeating the frosting layers until there is no cake showing through. Refrigerate the cake between layers of frosting for about 15 minutes at a time.
Next, pipe small dots of red frosting onto the outside of the cake, and gently spread, creating a “tie dye” effect. Sprinkle crushed candy canes around the outside of the top of the cake and around the base of the cake. Place the cake in the refrigerator until ready to serve.
About 30 minutes before serving, remove the cake from the refrigerator.
Prep Ahead Options
- Mix together the dry ingredients and wet ingredients. The ingredients can be mixed together, but kept separate until ready to bake.
- Make the frosting and store in the refrigerator. The cream cheese frosting can be stored in the refrigerator for up to 1 week. When you are ready to ice the cake, simply remove from the refrigerator about 2 hours before the cake is ready to be iced. Add the frosting to the mixer, and whisk on high until light and fluffy.
Serving Suggestions for Chocolate Peppermint Cake
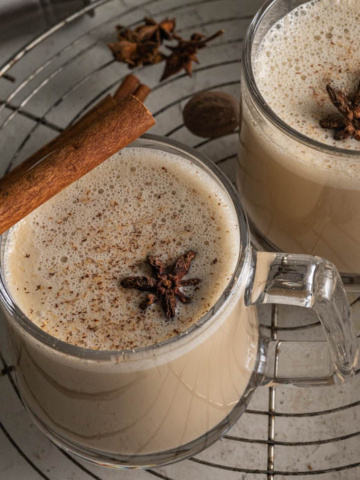
This cake is an awesome dessert for the holidays or any special occasion! It will wow your guests with both the flavor and the colors! Serve alongside your favorite peppermint ice cream or cup of peppermint mocha coffee!
Recipe FAQs
Absolutely not! You can leave out the food coloring step altogether if you prefer!
This cake is actually sometimes better once it has been frozen! To freeze the cake layers before icing, simply let cool until the pan is able to be touched. Remove the cake from the pans, and let cool for about 10 more minutes. While the cake is still slightly warm, tightly wrap each cake in 2-3 layers of plastic wrap, ensuring it is well sealed. Place in the freezer for up to 2 months. When you are ready to ice the cakes, simply remove from the freezer and set on the counter about 2 hours before you are ready to ice.
I have not tested this recipe with dairy free ingredients, so I cannot say for sure that it would produce the same results.
Tips and Tricks for Success
- Be sure cakes are completely cooled before icing. Icing cakes too soon, especially gluten free cakes, will result in a crumbly mess. It is best to ice them once completely cooled, or follow the instructions for freezing the cake layers and ice them that way.
- Do not overmix the icing. Sometimes it is possible to whip the icing too much. This results in large air pockets and a soupy frosting. It's important to mix it until lightly and fluffy, but not too much.
More Holiday Recipes You'll Enjoy

Chocolate Peppermint Cake (Gluten Free)
Equipment
- Stand mixer
- Paddle attachment
- Whisk attachment
- Parchment paper
- 8-inch cake pans
- Measuring spoons
- Measuring cups
- Spatula
- Offset spatula
Ingredients
Chocolate Peppermint Cake Ingredients
- 2 ¼ cups granulated sugar
- 1 ¼ cups unsalted butter room temperature
- 2 each eggs
- 3 cups gluten free all purpose flour
- ⅔ cup dark cocoa powder
- 1 ½ teaspoons baking soda
- 1 teaspoon baking powder
- ½ teaspoon coarse Kosher salt
- 2 cups whole milk
- 1 tablespoon white vinegar
- 2 teaspoons peppermint extract
- 1 teaspoon vanilla extract
- ½ cup dark chocolate chips melted
- 1-2 each candy canes crushed
Peppermint Cream Cheese Frosting Ingredients
- 2 cups cream cheese room temperature
- 1 ½ cups unsalted butter room temperature
- 8 cups powdered sugar
- 1 tsp peppermint extract
- ½ tsp coarse Kosher salt
- Red food coloring (paste or liquid)
Instructions
- Preheat the oven to 350°F. Brush 2 8-inch baking pans with unsalted butter, and dust with gluten free all-purpose flour. Place a circle of parchment paper at the bottom of each pan, and set aside.
- Place granulated sugar and butter in a mixing bowl, fitted with a paddle attachment, Turn the mixer on high and cream together sugar and butter until light and fluffy, about 2 minutes. Turn the mixer off, and scrape down the bowl. Add eggs, one at a time, scraping down the bowl after each addition.
- Whisk together gluten free all-purpose flour, dark cocoa powder, baking soda, baking powder, and salt in a medium bowl and set aside. Mix milk, white vinegar, peppermint extract, and vanilla extract in a measuring cup.
- Add ⅓ of the dry ingredients to the mixing bowl, and mix on low speed just until combined. Turn the mixer off, and scrape down the sides of the bowl. Add ½ of the milk mixture, and mix on low speed just until combined. Turn the mixer off, and scrape down the sides of the bowl. Add another ⅓ of the dry ingredients to the mixing bowl, and mix on low speed until combined. Turn off the mixer, and scrape down the sides of the bowl. Add remaining milk mixture, and mix on low speed just until combined. Turn the mixer off, and scrape down the sides of the bowl. Repeat with the remaining dry ingredients.
- Once the ingredients have all been added, place the chocolate chips into a microwave safe bowl, and microwave on high for 1 minute. Stir well, and if needed, microwave in 20 second increments until the chocolate is melted. Add about ⅓ cup of the cake batter to the bowl of melted chocolate and mix until well combined. Add the mixture back to the cake batter, and gently fold until well combined.
- Divide evenly among the two cake pans. Place pans in the oven and bake for 35-40 minutes, or until the cake bounces back when gently pressed in the center or a toothpick inserted in the center comes out clean. Remove from the oven, and place on a cooling rack for 10-15 minutes. Turn the cakes out onto the cooling rack and let cool completely.
- While the cakes cool completely, make the Peppermint Cream Cheese Frosting. To make the frosting, place cream cheese in the bowl of the stand mixer, fitted with a whisk attachment. Whisk on medium speed until the cream cheese is blended and beginning to become fluffy. Add the butter, and mix until well combined.
- Add the powdered sugar, peppermint extract, and salt to the bowl, mix on low speed until the sugar is incorporated. Turn the mixer off and scrape down the sides of the bowl. Turn the mixer on high speed, and whip until light and fluffy. Turn the mixer off, and scrape down the bowl again. Turn the mixer on high, and whisk 1-2 minutes until the mixture is smooth and well incorporated.
- Remove the bowl from the stand mixer, and place about ⅓ of the frosting in a medium bowl. Whisk 1 tsp red food coloring or 15-20 drops of red gel food coloring into the medium bowl of frosting until you have reached the desired degree of red.
- To ice the cake, place red frosting into a piping bag or large zip top bag. Place a bit of white frosting into another piping bag or large zip top bag. Cut the end of the piping bag or corner of a zip top bag to create a ½ inch opening.
- To frost the cake, first cut each cake in half crosswise, creating four layers of cake. Place the bottom layer of cake onto a cake stand or plate and place on a turntable (if you have one!). Beginning with the white frosting, pipe a circle around the outside edge of the bottom layer of cake. Next to the white frosting circle, place a circle of red frosting. Repeat the process with the white frosting and red frosting until you have covered the entire layer of cake. Repeat the process with the next 3 layers of cake, and finally place the top layer on top of the cake.
- Chill the cake, until the center layers of frosting are firm, about 15 minutes. Frost the outside of the cake with white frosting, creating a “crumb coat”, and then repeating the frosting layers until there is no cake showing through. Refrigerate the cake between layers of frosting for about 15 minutes at a time.
- Next, pipe small dots of red frosting onto the outside of the cake, and gently spread, creating a “tie dye” effect. Sprinkle crushed candy canes around the outside of the top of the cake and around the base of the cake. Place the cake in the refrigerator until ready to serve.
- About 30 minutes before serving, remove the cake from the refrigerator. ENJOY!

Leave a Reply